

How to add and manage a milestone
Add a milestone
-
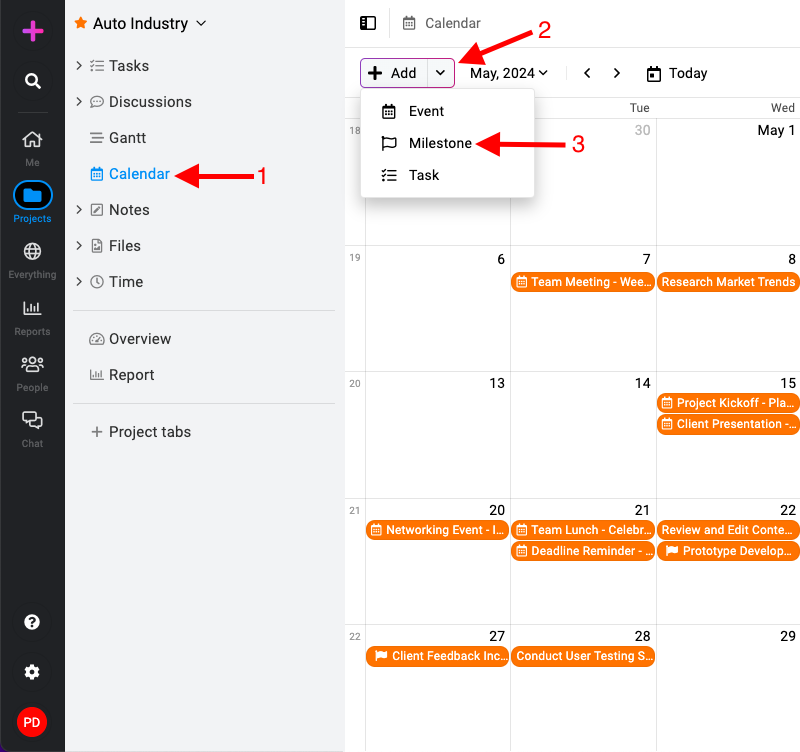
Navigate to the calendar section: Click on the “Add” button and select “Milestone“.\
-
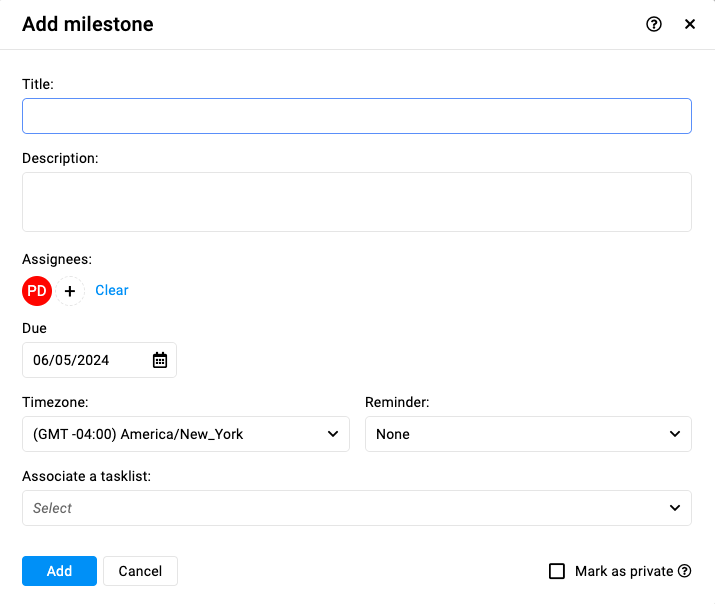
Fill milestone details:\
-
Title: Enter a title for your milestone.
-
Description: Add any additional details or context for the milestone.
-
Assignees: Select the team members who are responsible for this milestone.
-
Due date: Choose the deadline or due date for achieving this milestone.
-
Timezone: Select the appropriate timezone for the milestone deadline.
-
Reminder: Set a reminder to notify assignees before the milestone due date.
-
Associate a tasklist: Choose the specific tasklist that this milestone will be associated with.
- Note: A milestone is associated with a single task list; each task list can have only one milestone linked to it.
-
Mark as private: Check the “Mark as private” option if you need to restrict the visibility of the milestone to selected assignees only.
-
-
Save the milestone: Click on the “Add” button and save the milestone.
Edit a milestone
-
Editing milestone: Right-click on the milestone you want to edit.\
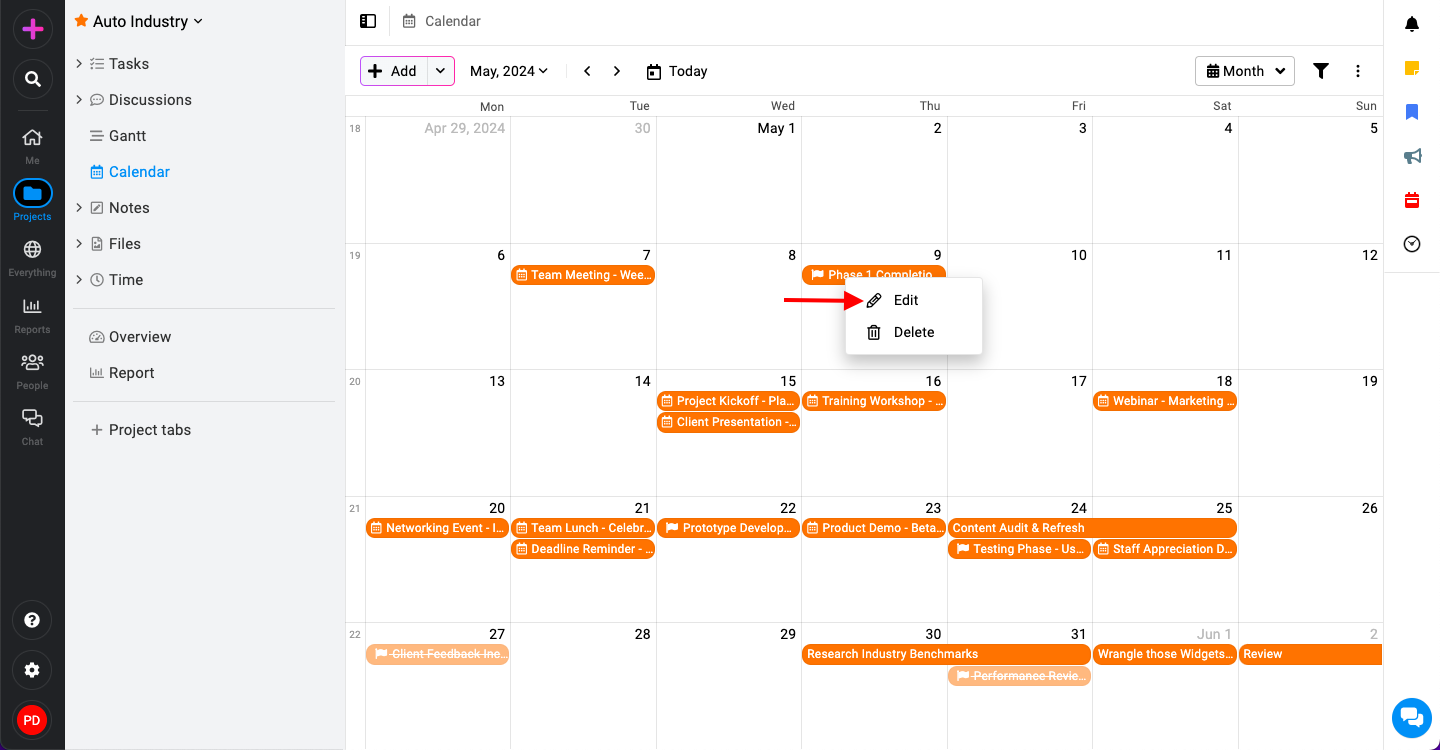
Editing a milestone in ProofHub -
Select ‘Edit‘ from the context menu that appears.\
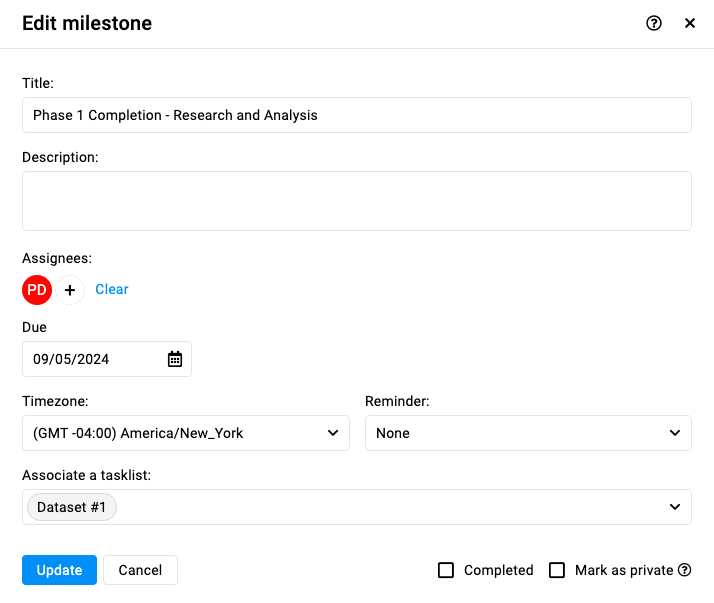
Milestone edit window in ProofHub -
In the edit window, modify the item’s details (e.g., title, description, due date, time, etc ).
-
Click ‘Update‘ to apply the changes.
-
Delete a milestone
-
Deleting milestone: Right-click on the milestone you wish to delete.\

Deleting a milestone in ProofHub -
Select ‘Delete‘ from the context menu.
-
Confirm the deletion by clicking ‘Yes‘ in the confirmation window.\

Deleting a milestone in ProofHub
-
Last updated today
Built with Documentation.AI