

How to add tasks via email-in
-
Copy email-in address: Right-click or click the three-dots icon and select “Copy email-in address“.
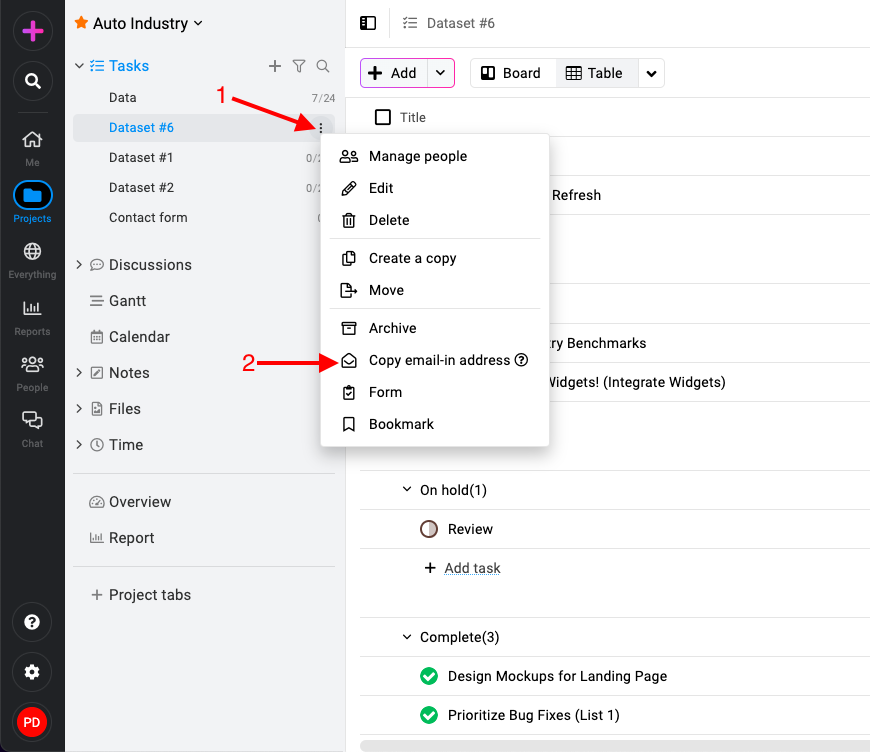
Copy email-in address in ProofHub -
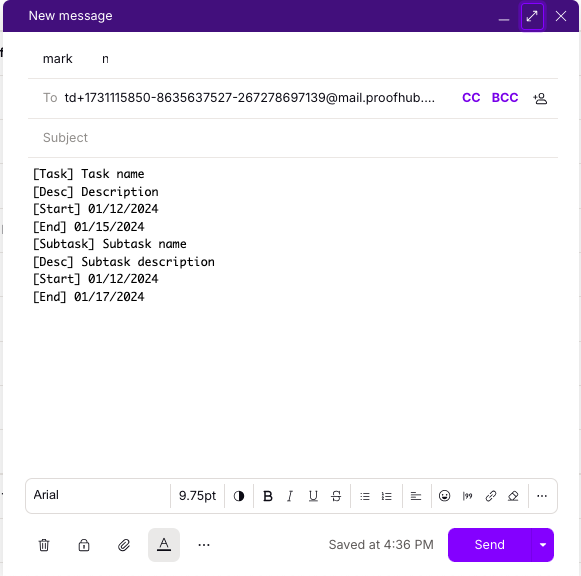
Compose email: Open your email client and create a new email. Paste the copied email-in address into the recipient field.
Email-in task -
Use email body format: For a more organized approach, you can use specific formats in the body of the email to define task details. Choose one of the following formats:
[Task] Task name [Desc] Description [Start] 01/12/2024 [End] 01/15/2024 [Subtask] Subtask name [Desc] Subtask description [Start] 01/12/2024 [End] 01/17/2024 -
Send email: Once you’ve entered all the task details in the email, send it to the email-in address associated with your selected tasklist in ProofHub. The content of your email will be processed, and a task will be created in the selected task list based on the provided details.
Prerequisites: Before using the email-in feature in ProofHub, ensure the following conditions are met:
-
Email id needs to verified.
-
You have logged into your ProofHub account at least once.
-
You are assigned to the project where you want to add tasks via Email-in.
-
The email address used for Email-in is the same as the one associated with your ProofHub account.
Last updated today
Built with Documentation.AI