

How to log time in a task
Logging your time in ProofHub helps keep track of the effort spent on tasks. Follow these steps to accurately log your time:
Add time using the timer
-
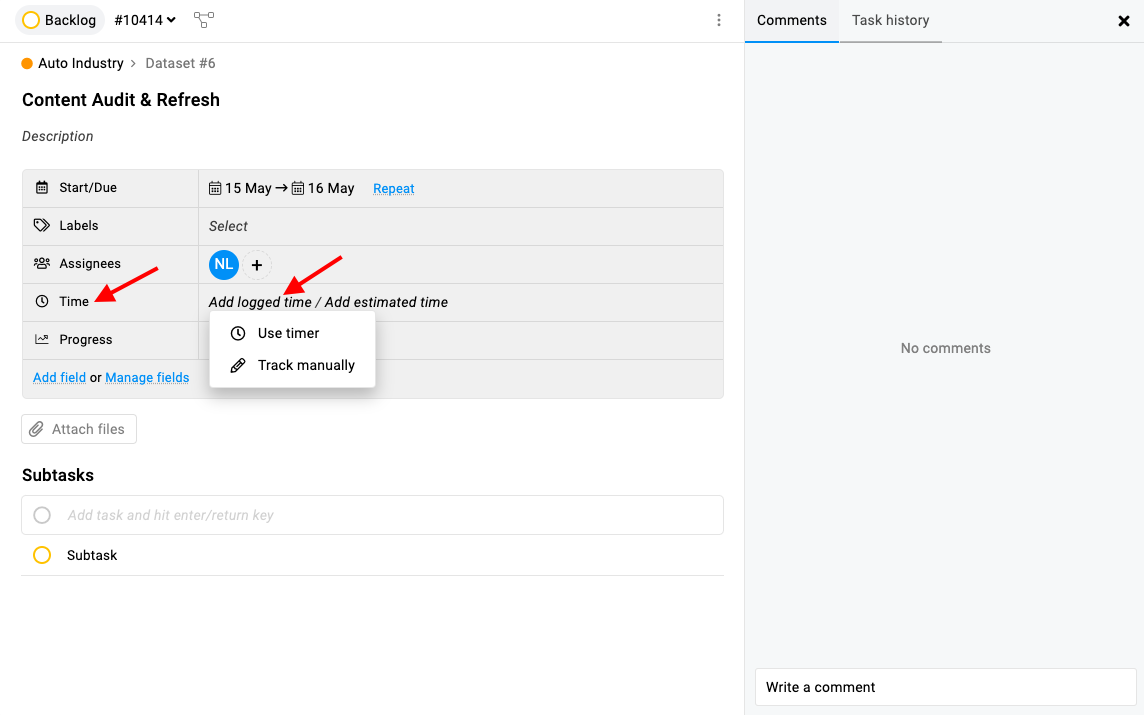
Open the task: Select the specific task you want to log time for.
-
In the task details, find the “Time” field. Click on the “Add logged time” field.
-
You will see two options:
-
Use timer
-
Track manually
-
-
-
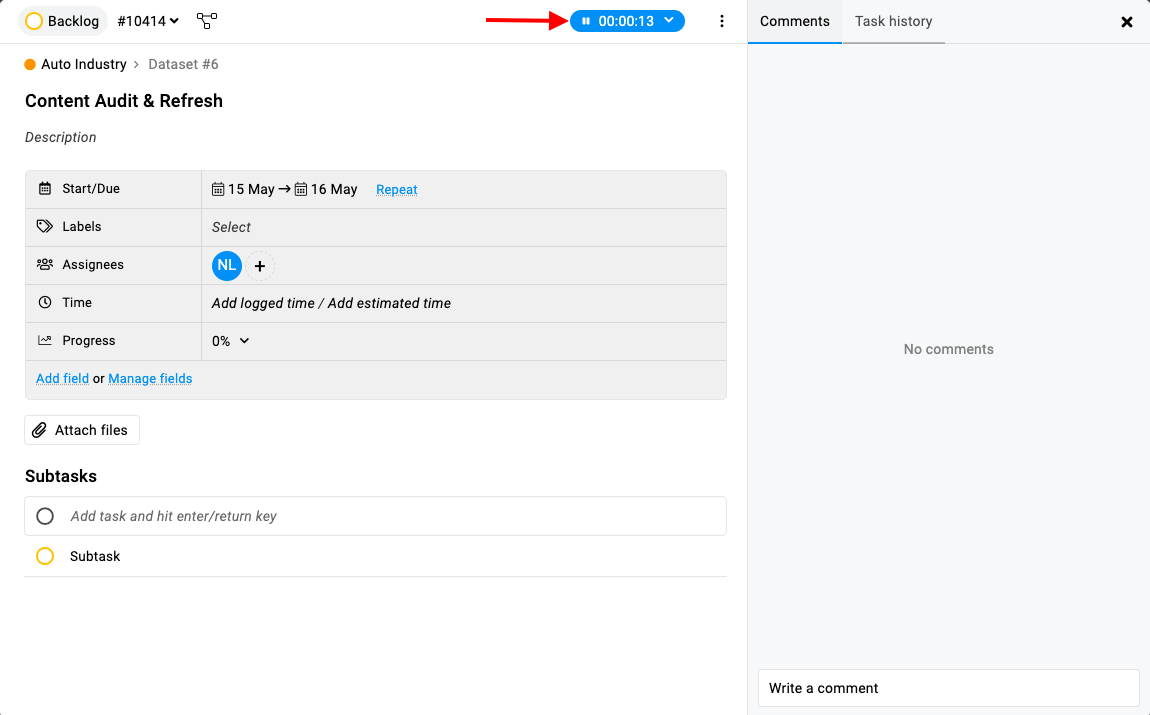
Using the timer: If you select “Use timer”, the timer will start running within the task. The running timer will be visible at the top of the task window.
-
Managing the timer: To stop the timer, click on the timer arrow.

-
You will have two options:
-
“Save time”
-
“Discard”
-
-
-
Saving the timer: Select “Save time” to open the time logging window.
-
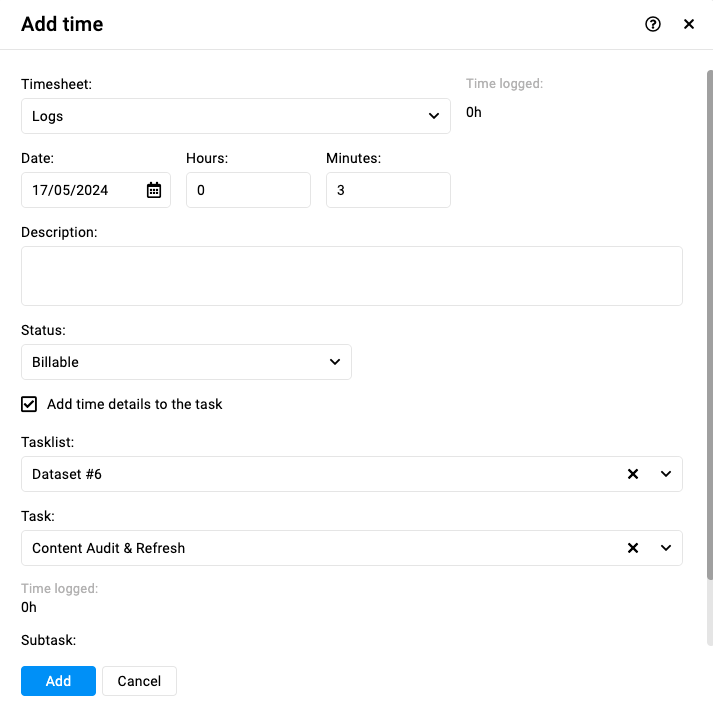
In the time logging window:
-
Select the timesheet where you want to log the time.
-
Change the date, hour, and minutes if needed.
-
Change the status (e.g., Billed, Billable, Void) as necessary.
-
-
-
Click the “Add” button to save the logged time.
Add time manually
-
Open the task: Select the specific task you want to log time for. This will open the task details.
-
In the task details, find the “Time” field. Click on the “Add logged time” field.
-
You will see two options:
-
Use timer
-
Track manually
-
-
-
Using “Track manually”: If you select “Track manually”, the time logging window will open directly.
-
In the time logging window:
-
Select the timesheet where you want to log the time.
-
Change the date if needed.
-
Manually enter the hours and minutes spent on the task.
-
Change the status (e.g., Billed, Billable, Void) as necessary.
-
-
-
Click the “Add” button to save the manually logged time.
Add estimated time in a task
-
Estimated time option: In the task details, find the “Time” field. Click on the “Add estimated time” option.

-
Enter estimated time:

-
Enter “Hours” and “Minutes” to input the estimated time required for the task.
-
Click the “Update” button to set the estimated time.
-
-
View the estimated time: The estimated time will be visible in the task window under the “Time” field.

Note: An email notification will be sent if the logged time exceeds the estimated time.
Last updated today
Built with Documentation.AI